I know this sounds crazy, but its finally time to build the first wireless network and server out on the mountain! However, with this being off-grid, there needs to be some special considerations.
First, why, especially if there is no Internet out there???? Simple reason, I would like to get some measurements and automation out there going at some point. Thats going to take some time to do, but I need to first get an infrastructure in place and start testing that to make sure it works before building anything more intensive out there.
The first special consideration is power. Everything out there is pretty much 12 volt DC still right now. Eventually that will move to 24v, probably next spring, but for now its much easier and cheaper to run at 12v. Most electronics already run on DC, but unfortunately they run at whatever special voltage they want. Many times you have to convert AC power, to DC power, which saps energy. In this case, we would have to run DC to AC to DC, which is a huge power suck… so thats not going to work.
The second issue with power is that this is off-grid, so I want something that will consume a minimal amount of power, especially as I will not plan to turn this off. Computational requirements are extremely minimal so this doesn’t have to be a beast of a system.
What I ended up deciding on was two USB based products. Why, because I can move from 12 volt DC (the battery bank) to 5 volt DC (USB power) pretty easily with minimal requirements and complexity. Plus I could run a few extra lines for other gadgets that are USB powered.
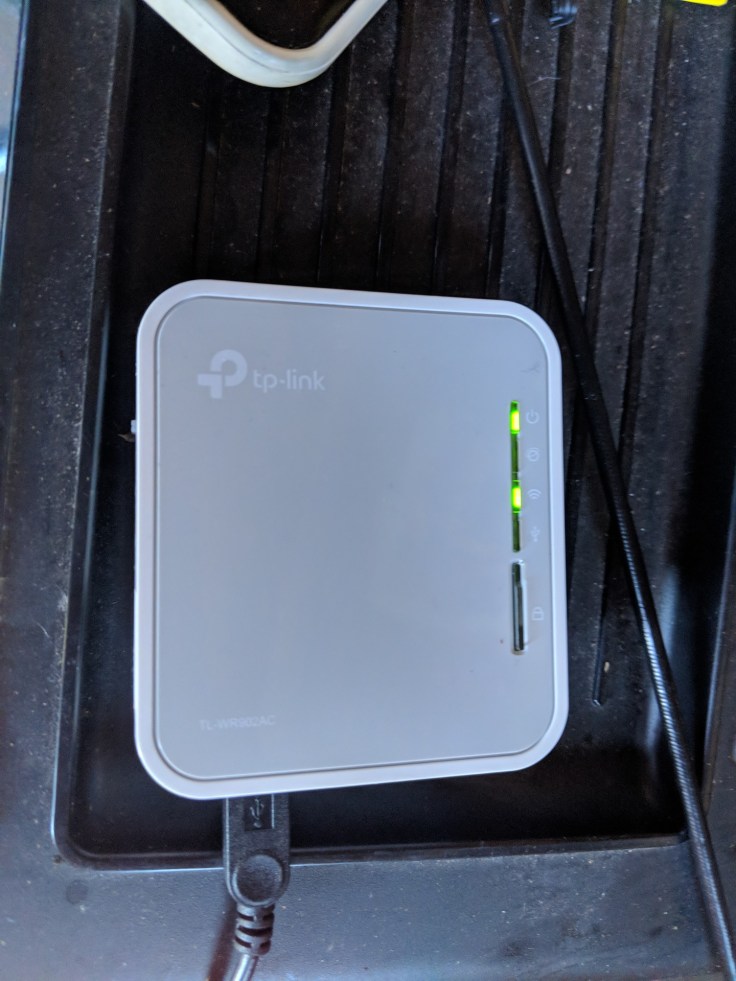
The wireless router I chose was the TP-Link AC750 Wireless Travel Router (TL-WR902AC). Simple reason is that it has all the standard things I expect from a router (wireless, DHCP, etc), has pretty decent range, and is powered by USB. Its also pretty simple to configure.
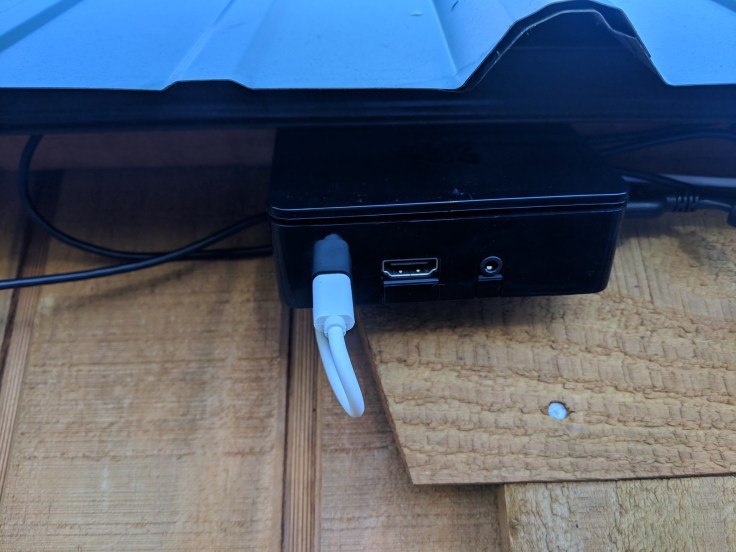
The second system I chose was the Raspberry Pi. Its a low powered, rock solid stable linux system that is pretty easily configureable. It’s also headless (no need to connect a monitor to it). Unfortunately, I had planned to mount this indoors but it ended up getting shoved under the gutters for now because the USB data cable I had it connected to was too short (more on that later in this post). Worst mounting job ever.
Anyway, the difficulty with this particular setup is that it needs to be built and configured on the internet. Yea, thats not available out there. So the whole system had to be built back home, and on the home network. Then it had to be completely reconfigured to move to the off-grid network. Pro-Tip: do that while you have the internet available so you can look up questions.
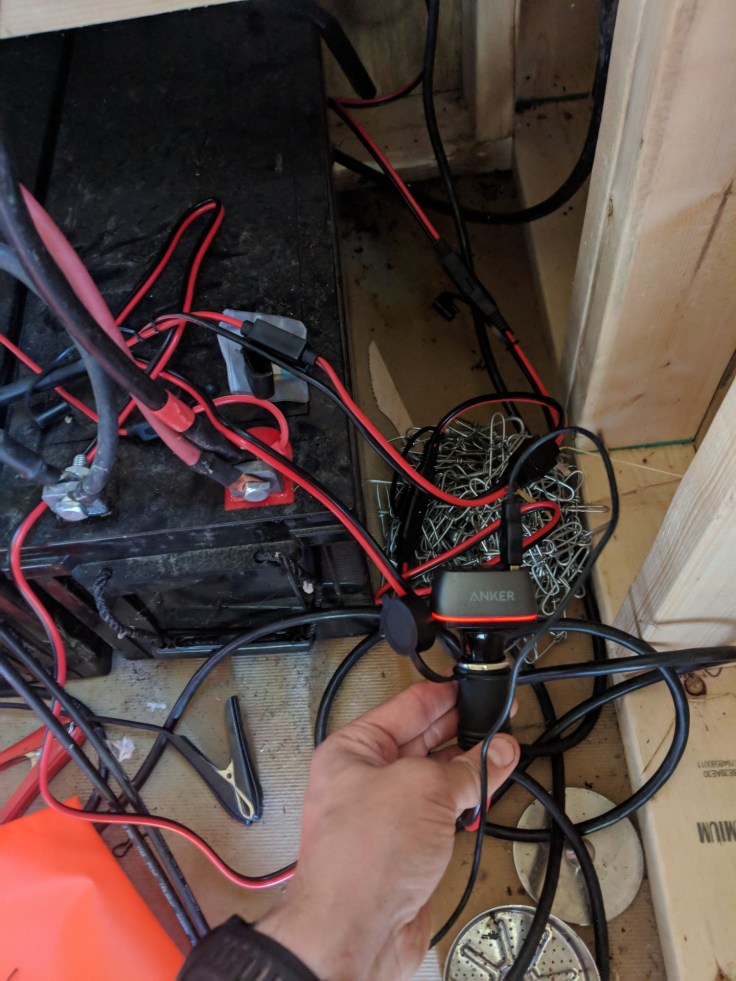
Back to that problem with power again. I finally ran a few DC lines through the cabin. There was some AC extension cables before, but having DC lines means I can power things but not have to fire up the whole inverter to get AC. First thing was to get the DC lines installed on the battery bank (which still needs to get into a battery box).
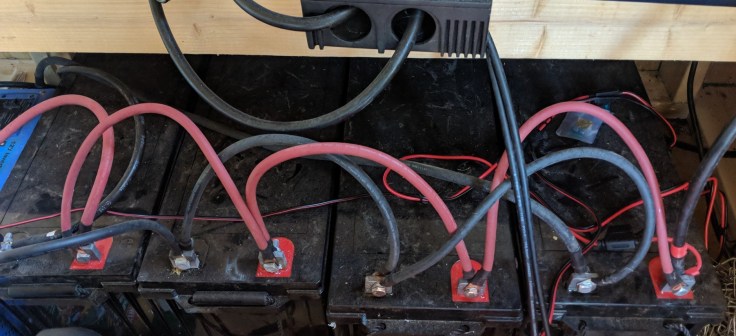
Its hard to tell in this picture (note to self, clean this up next time I am out there) but there are now two new connections on the battery bank. You can see it easiest on the furthest right battery on the back of the red terminal, you will see a third smaller cable connected, in red. On the far left battery bank, there is a similar black wire connected (not shown cause i cut off the photo..oops). The small wire coming from the left to the center, and the red wire from the right to the center are the new 12v lines.
The new wires have SAE connections on them, making it easy to install splitters and connect new or different wires. This will make my life much easier in the future. This also allowed me to get one DC outlet directly at the battery bank.
Running DC electrical to my bunk and where the server is, was the next priority.


Obviously, I just strung this through the rafters. its not an ideal solution, but it works. but now the lantern has USB power, as does the raspberry pi, and so does my other USB devices. The books do not need power 😉
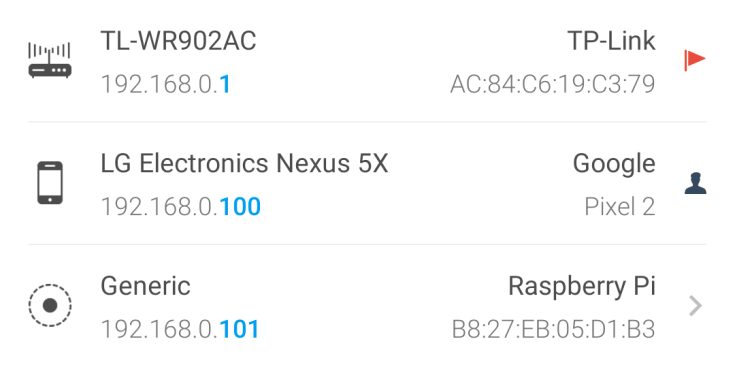
Finally it was time to fire it all up, unfortunately it was all on DHCP. DOH! But fortunately I had an app on my phone so I could scan the network.
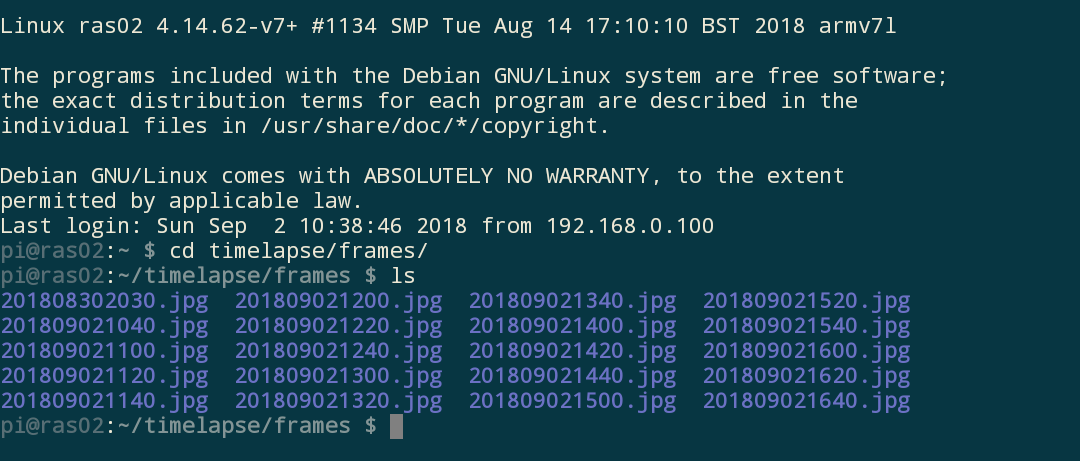
Next was to check in on the server and connect to it. For that I used Juice SSH. However, when I checked the server, I discovered something wasn’t working right. Part of the plan was to do some testing by setting up a camera to do some time lapse photography while I was away. But it wasn’t working. It was scheduled to do picture every twenty minutes during the day.
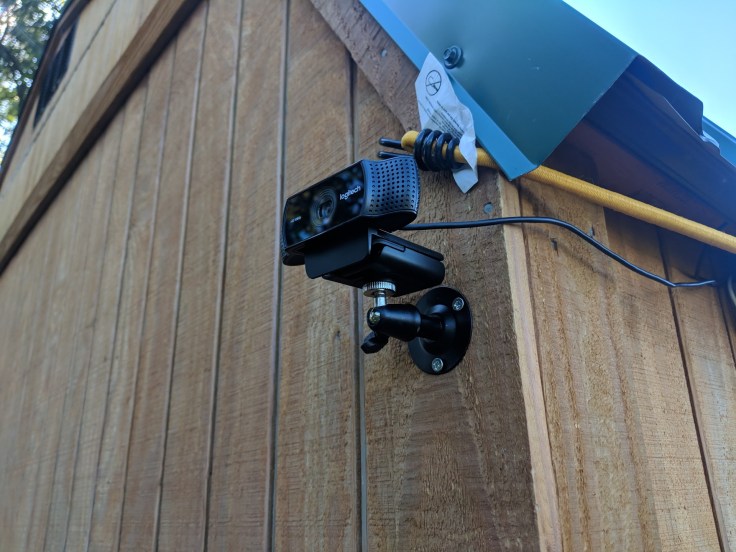
Obviously, this is a pretty poor choice for a outdoor webcam cause.. its a desktop version and not setup for weather. Whatever, we are just testing here. Will find out in a few days how its doing. I will put something more robust up later.
But anyway, it wasn’t working. I kept poking at the server to try and figure out why it wasn’t running. The camera was working, and my script was working, but it wasn’t working as intended.
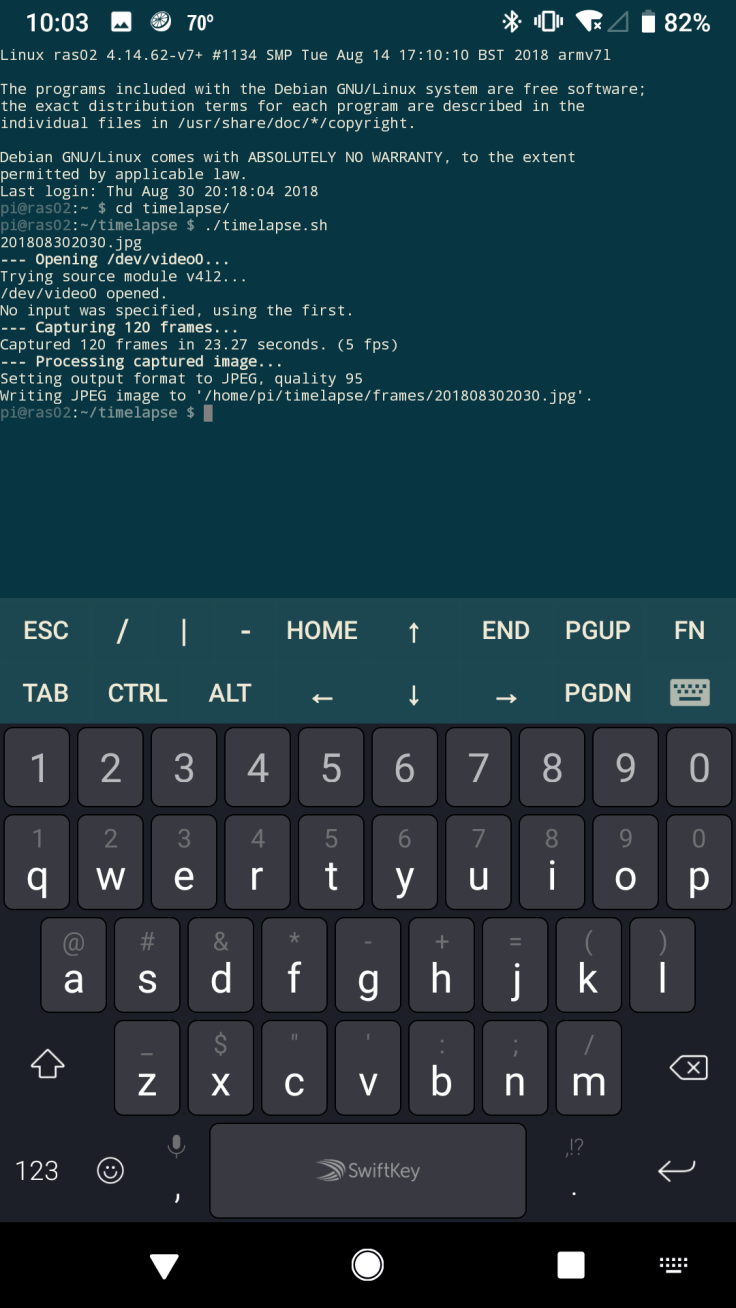
Turns out that the internal clock stopped going, and it was looking for an NTP server to connect to get time. Well that sucks. There is no server to connect to as there is no internet. So I had to manually configure the clock. Problem is I am adequate at best in *nix command line, and I generally at use the internet to prompt me for commands to use. Eventually, I remember that you had to use the date command. And then after slowly reading the man (manual) page for it for a while I remembered how to configure the clock. Now we are back in business.

After a couple of hours, I came back and checked out the server to make sure it was still taking photos, and taking photos correctly. Looks like it was. Looks like the network, server, camera, and using the phone as a shell worked 🙂
So far, I am calling this a success.

Leave a comment