
In the last post, I covered the parts that are required to build a micro-grid solar system. In this post, the focus is on my first attempts at assembly and generating the first kilowatt hour of power. Of note: this is still in an experimentation phase and not permanently setup. I still need to learn a bit more about electrical grounding, and conduit. However, power was generated.


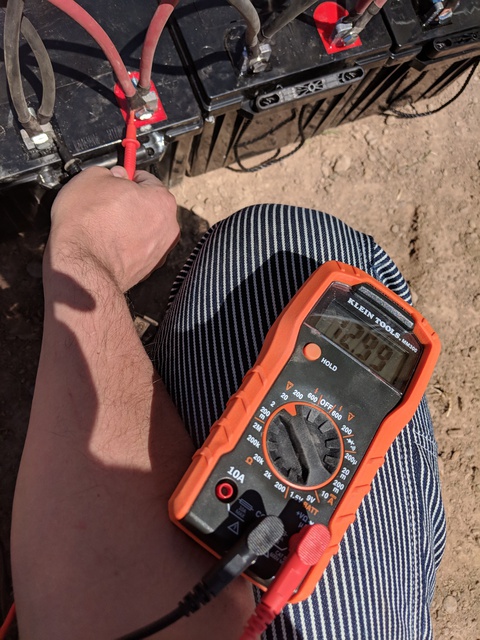
The first item of business is setting up the four batteries into one big battery bank. These batteries are 200 amp hour (ah) at 12v and thats the system I am running for now (will move to 24v later). As such, we need to run these batteries in parallel. So what does this mean? What I did was wire the batteries so they stay at 12v, but just add all the watt hours together. This means that the battery bank will be 800 ah at 12v. That will give me a potential storage of 9600 watts (as mentioned in the previous post, not all energy is available). To do this, I wired up the batteries to each other, as shown in the above pictures.
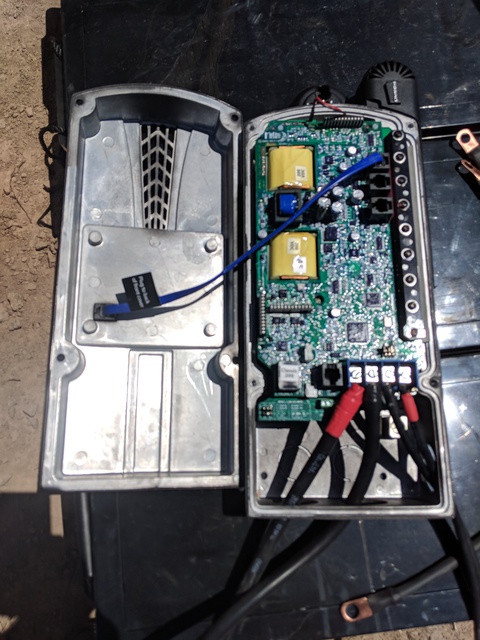
The next part of the wiring, was to connect the Midnite Solar Charge Controller; this was pretty simple. There are two wires that are run to the battery bank, and another two wires that are run to the solar panels. The wires are run through the holes in the bottom, then off to the appropriate area. In this case, battery bank wires are on the left, and solar panels are on the right. As the solar panels run at higher voltages, I used thinner wire here. As for the battery bank, its at 12v. So I used as thick as wire as possible (which I had to trim some off to get it to fit). The wires are also run as short as feasible. This is to avoid voltage drop, too much voltage drop will cause a brownout, or worse, an inability to create power at all (which I discovered in my original testing back at the house). This is another reason why I will be moving to 24v in the future.
Whereas the battery bank was wired in parallel, the solar cells were wired in series. This creates much higher volts and far less voltage drop. However, even just a MINIMAL amount of shading can knock out nearly all the power production. That said, with the panels being placed the middle of a pasture, there is very little concern about shade.


For this test, I just simply tilted the panels toward the sun by leaning them up against the shed. This was nearly due south, and worked for a temporary setup. Wiring the panels together was as simple as pushing the two wires together using a provided MC4 connector.

Finally, I had enough components wired to power up the Midnite Solar Charge Controller. There are a few configurations that need to be made, including what voltage you want to bulk charge, absorb, and float. Bulk charge is just getting the maximum amount of power into the batteries. Absorb is basically topping it off. Float is just making sure your batteries are always charged and available. The settings I needed were printed right on the battery, but for other batteries you can get the information from the manufacturer’s website. I then used the input menu on the front of the charge controller to set the parameters.
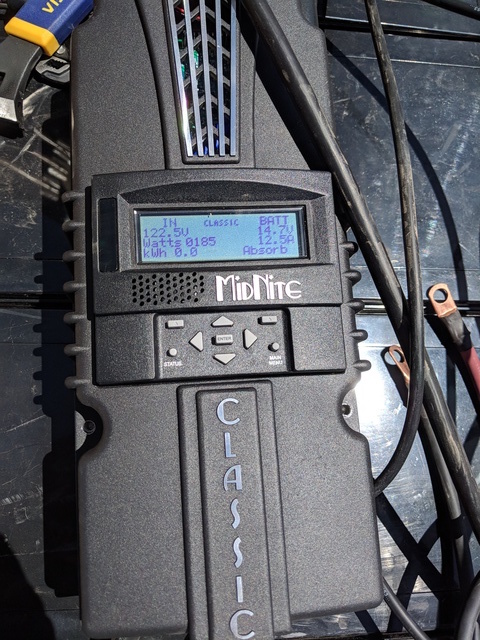
Based on this reading, we are generating power! However, I was extremely disappointed with this. I should have been generating way more watts than 185. No matter what I tried to do I couldn’t increase the wattage. Then I had an idea.


I attached the 12v inverter to the battery bank. The inverter’s negative is attached to the furtherest left battery negative, and the furthest right battery positive. I then added a load to the inverter. In this case, I needed to charge up my electric chainsaw battery. I plugged that into the inverter, and started the charge. It worked! We are now creating power, and using power!
So based on that test, adding a small load increased the amount of production. Then it dawned on me. The batteries I were using, were fully charged when I left the house. The batteries didn’t need any more power, so the solar charge controller wasn’t creating power that wasn’t needed. Time for another test. Lets put a big load on it.
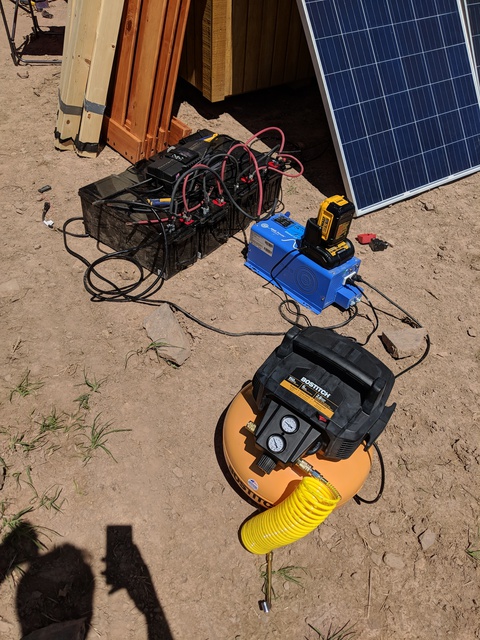
About the biggest electrical hog I had out there was an air compressor. This beast consumes a lot of power, which means I need to produce a lot of power. I turned on the air compressor, and the inverter didn’t shut down (meaning it was drawing less than 2000 watts, the limit of my inverter). The fact it didn’t shutdown told me I should be able to run some larger devices no problem.
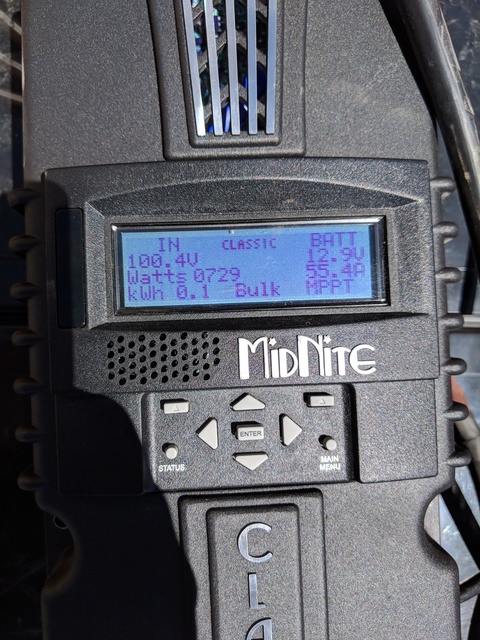
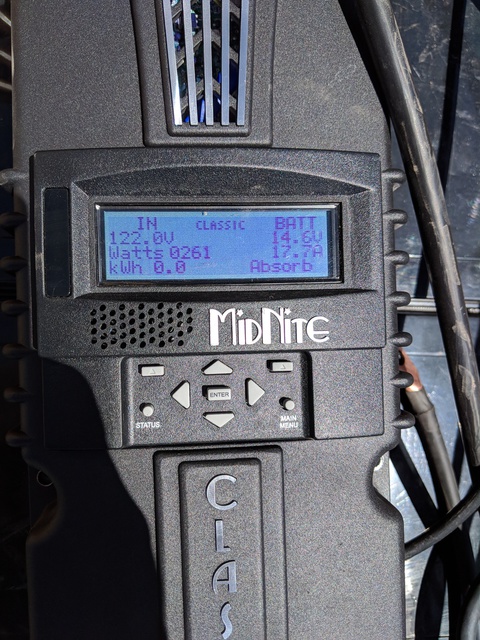
Bingo! Now we are making 729 watts of power. This confirmed that we are now getting in a good amount of power. I ran the air compressor for a while and ensured that I drained the battery bank just a bit. After about 20 minutes, I shut off the compressor, and grabbed some food. A while later, the battery banks were completely filled and I had used and generated my first kilowatt hour of power off grid!
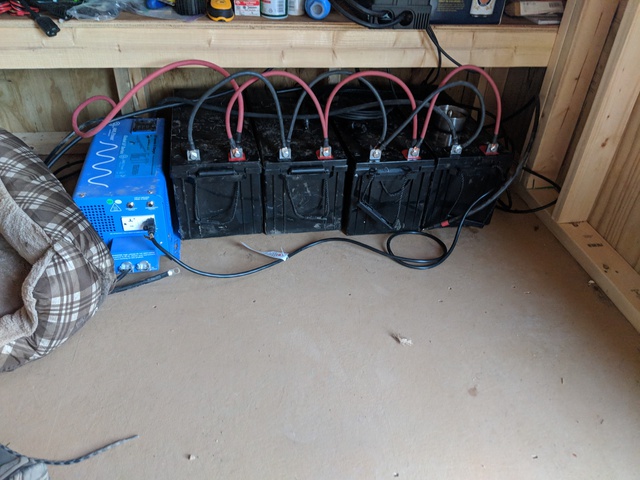
While these tests were pretty ugly when it comes to assembly, I wanted the batteries and equipment outside and close to the panels. However, electricity and rain doesn’t exactly mix so I brought the batteries back inside after the test to their more permanent home. That meant disassembling and reassembling the solar charge controller, inverter, and battery bank. Fortunately, the wires to the solar panels were long enough I could run the lines to the panels from inside the shed.
I then plugged in a extension cable and ran it through the shed’s rafters, and brought power to the bunk. Now I can power up devices in the evening, but also provide big power where needed for other projects.
NOT SHOWN (sadly) I also hooked on some alligator electrical clips with cigarette lighter plug, and plugged in USB charger. This was a really efficient way to start charging my phones, and tablet. Using the DC to AC inverter consumed a ton of power just to supply a minimal amount of electricity (due to loss during the conversion). This solution drew much less loss, and was 12v to 5v DC to DC power.

Leave a comment