
So in part I of starting an orchard, I went through why I want an orchard, but in this post, I will go through the planning and prepping I did.
First off, this project almost didn’t get pulled off. First thing I learned about trees is you have to plant them winter or late spring. Yea, I didn’t know that so my planting trees in early April was about the latest you can plant in my region. So, after learning that everything became a bit rushed. What trees do you get? What equipment do you need? What things do you need to learn about, that you don’t even know to ask?
The first thing I did was: hit the books and just get smart on fruit trees. Part of that is actually going to the books, and the other part was watching youtube videos. One of the most respected books on the subject of all things homesteading is The Owner-Built Homestead by Barbara and Ken Kern. This book was originally published in 1961 as part of a series on self sufficiency, and every single blog, forum, or post says to turn to this book first for anything homesteading related. I am glad I did, there were a lot of tried and true solutions, for things I hadn’t even considered.
One of the the ideas I quickly embraced was his ideas for tree placement. His plan accounted for symmetry, pollination, adding future dwarf trees, and adding bramble bush in the future.

I really liked this idea, but I decided a few things like, I wanted to use some of these trees, but I also wanted to commit to a larger amount of land for this (I have twelve acres, lets go nuts). I modified the design slightly, and came out with this layout (made in Google Slides).
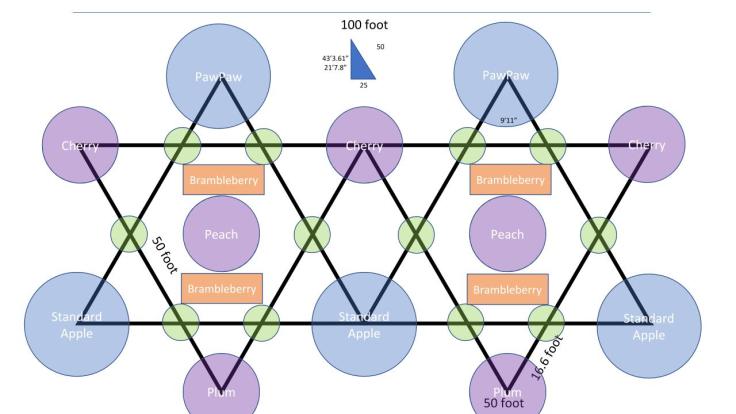
In this design, the length of each side of the triangle (blue blue blue, or purple purple purple) is 50′. For now, I am only planning on setting up 12 trees (blues and the purples), but I still have some room for dwarf trees (small green circles) and bramble-berries in the future.
The next thing was placement. Where do you plant an orchard (other than in the ground). Turns out, my land is in a nearly ideal location for an orchard. The land gets good drainage, full sun, and most importantly… a hill. Turns out, planting orchards on the side of a hill is really important.
An ideal slope is about 4% to 8%. On top of the hill exposes the trees too much to gusts of wind, cold, and other badness. My trees will be on the opposite side of the prevailing wind, giving them some protection from the insane wind storms up there, at least until they get bigger and stronger. Additionally, cold air will sink down the hill keeping the warmer air by the trees. And the fact its next to the pasture will ensure that the sunlight will hit the trees early in the day. Only issue, the hill is about 2,000 feet in elevation which means it on average 5.6 degrees cooler than sea level introducing concerns about late growth in the spring and earlier frosts in the fall.
Ordering Trees
While I was working on this in the winter I was getting ready to plant the trees in the spring, I made a discovery. NO ONE TOLD ME YOU DON’T PLANT TREES IN THE SPRING. I am a more traditional, plant your corn and beans in the spring and wait for the fall. No, apparently not with trees.
RULE #1 Plan on planting your trees between December and March.
IMPLIED RULE #1 Yes, your ground may be frozen, so make your holes in the Fall if you can.
IMPLIED UNDERSTANDING OF RULE #1 yea, I didnt know that so I wait just long enough for the ground to thaw to dig the holes then the grown refroze.
RULE #2 Order your trees for your planting time.
IMPLIED RULE #2 Order your trees early so they are cheaper and available.
IMPLIED UNDERSTANDING OF RULE #2 Find a place that may gouge you, but get you a good tree and ship to you quickly because you didn’t know about Rule #1
RULE #3 Make sure your trees are hardy enough for the zone you are planting in.
IMPLIED RULE #3 Add +1 to the zone to be on the safe side. So if you are in zone 5, only order plants suitable for 6.
IMPLIED UNDERSTANDING OF RULE #3 Ask around what other people grow.
I ordered the following for my orchard… on March 29th:
- Arkansas Black Apple Tree
- Gala Apple Tree
- Honeycrisp Apple Tree
- Black Ice Plum Tree
- Methley Plum Tree
- Red Haven Peach Tree
- Elberta Peach Tree
- 3x Lapins Cherry Tree
- 2x Paw Paw (further research shows I should have ordered more of these, but they are pricey)
- 2x Triple Crown Blackberry bushes
Total cost: $689.30
Setting the Plot
Fouled up.. everything got fouled up. The one thing that did work was math, and a plan.
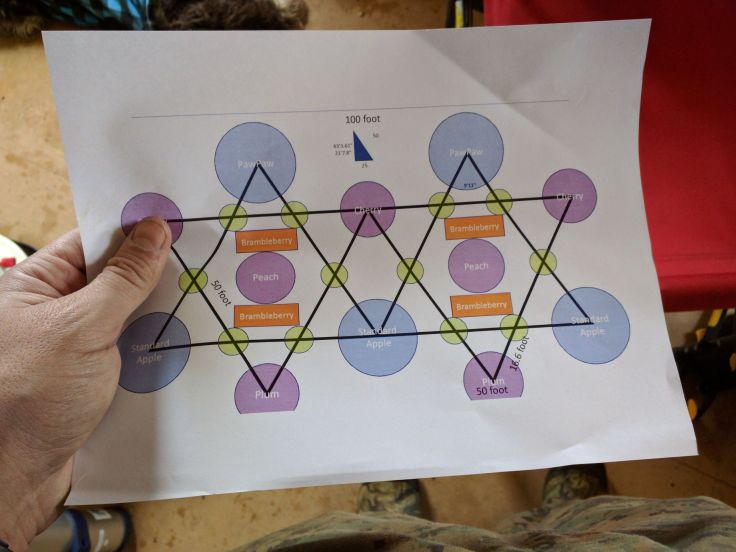
With my handy printed out map, I had some basic mathematics already down, cause I didn’t want to start figuring out geometry more than a decade after leaving academia. But with some of these basic measurements I was able to get a pretty decent lay of the land. I will spare you the details, but it only took six times to get it right.
Of course, its still quasi winter so… it snowed. Car made it up the mountain in the snow no problem (again, I strongly recommend snow tires).

Made coffee with the new 12v kettle (its really slow) out of the snow melt. It may be slow, but it uses solar energy and no fuel so that’s a positive.

Tyr also got to drink some snow melt out of the dog bowl. Threw it on the burner to warm it up for him.


Anyway, laying out the stakes with simple geometry and string just didn’t work. I dunno why, but for some reason I just couldn’t get the numbers to work out, nor the angles. Tyr didn’t help either. He kept getting trapped in the string.

Eventually, I just gave up and drove a stake in the ground and eyeballed it. I measured with Surveyor’s Wheel, then drove another stake. Then measured some more and drove another stake. With a triangle, I could walk around it and find out how much I was off by and move the stakes. I have no idea why, but this was much easier (but longer) than the original plan with the string. To keep my triangles in line, I did use the string though. Go back to the picture above… there are a LOT of triangles to work with. There was a lot of Pythagorean used, cause that was the only formula I could remember off grid with no access to the interwebz.


The stakes worked pretty well, until i hit really frozen ground and they snapped. In this cause I would leave the broken part of the stake in the ground, and spray paint it with orange paint. I only needed these in the ground for a few weeks until I could break ground and plant the trees. Even though I didn’t buy these stakes for this project, I am SO GLAD I had them around. They made the job much easier.
At this point the planning and prep was done. Next… time to plant the orchard.
