While my garden tent has suited me very well over the last few weeks, it is now time to upgrade to something a bit bigger and nicer. I want to eventually build something permanent, like a cabin, wooden yurt, or maybe a lookout tower cabin. For now, I just need to get a semi permanent structure up and going.
The original plan was to go from a small tent, to a larger tent, to a travel trailer and travel the country for a bit. Then use the travel trailer as a cabin until I build something permanent. However, due to some tax issues that are getting worked out… the trailer budget is now completely vanquished. So I am going to be working on making this tent the best possible option for the next few years. Additionally, the county government WAS NOT PLEASED at the idea of using the travel trailer as a cabin. So, a tent was the next best course of action.
The next question was, what type of tent to get that could serve all seasons? My initial thought was to do something similar to a used US Military Alaska Shelter System… but that was too large, and over priced. However, the US military has been roughing it for several centuries in the winter in different types of tents. Because my property had very little in the way of electricity, water, or other utilities, I researched the types of tents that were in use by the military during the Civil War, but these tents didn’t seem quite right either. However, the US Army officers received canvas wall tents that worked most of the year. That got me closer to what I really wanted, a good quality wall tent.
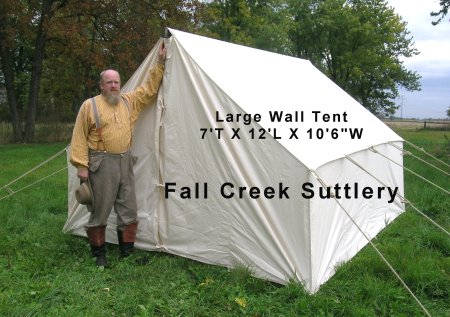
Civil War Style Canvas Wall Tent, via Fall Creek Suttlery
Based on the research, a good portion of the world still uses canvas wall tents. It makes sense too, they are fairly affordable for long term camping, have much higher ceilings than regular tents, thicker walls, and a stove jack so you can place a wood stove inside the tent for warmth and cooking (I am totally doing this). The tents have the ability to repel a good bit of the weather, but most do not have a floor. At this point in the world’s evolution, I want to have a floor.
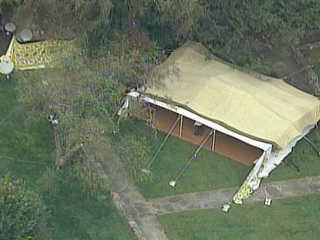
Mauammar Gaddafi put this tent up on Donald Trump’s property when he was visiting the United Nations. He was quite the fan of the Wall Tent.
The tents that have floors are fairly new, and kind of rare. I didn’t want to worry about moving equipment in, only to have it damaged by an unexpected storm. From what I found, most of the modern tents are sold for the purposes of long term hunting or using as a base camp for extended trips. Many refer to these tents as outfitter tents, even though its synonymous with wall tents.
For my tent, I wanted something with a substantial frame as the winds can be extremely gusty. I didn’t really care if I had natural or synthetic materials, but I did want to make sure I had good airflow and windows. Because the weather has been a bit cold, and I like to cook, I wanted to make sure there was a vendor installed stove jack so I could put a wood burning stove into the tent. Finally, I didn’t want to have to worry about UV light breaking down the material of the tent over time.
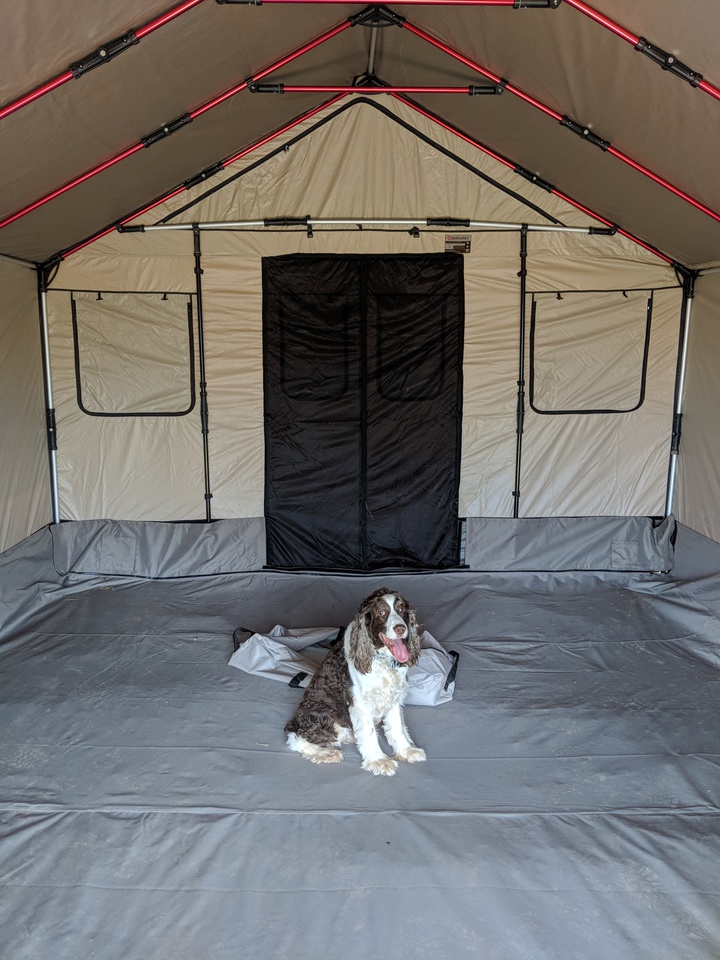
I won’t go through all the vendors I looked at, and the styles, but again… it was a lot. Too many to mention here. However, I decided on the Barebones Living Lodge Tent. At 12′ by 15′, 6′ walls, and a maximum height of 9′ (365 cm x 457 cm, 182 cm walls, 274 cm maximum height), it is basically a portable cabin. That’s really important to me, because I will probably want to move it around a few times to figure out the ideal place for me to put my permanent structure when I build it. There is UV protection due to the fact that they are using treated polypropylene vinyl as an exterior shell, which does have a slight smell. However, thats a shell and not inside the actual tent which is its own structure. That’s right, its a tent, and shell, which allows for impressive protection from snow, wind, rain, and sun. I will say, that the price I paid for my tent was substantially less than what was listed on the website due to a great sale, which included free shipping. I bought directly through Barebones, and they didn’t know I was going to be doing a review.


The shipping on this is… robust.
The entire package weighs in at a substantial 260 pounds (118 KG), which would be an absolute no-go for a hiking trip, but this is designed to be setup and left. However, because of this extra heft the tent needed to be shipped freight. My shipment was sent through XPO Logistics who did a great job coordinating with me and delivering. This also involved me carrying this up three flights of stairs for storage, and down three flights of stairs until I could get it packed into the car and brought out to West Virginia.


Opening it up revealed a few bags (Blockrocker for scale), a lackluster manual, and A TON OF POLES.
One of the things that bothered me was the manual. I had contacted the manufacturer and requested a manual be sent via PDF, because there is none on the website. I never did get the PDF, which I still want because I am storing all of my off grid stuff onto my tablet via Google Drive. I can’t just go hop onto the internet and get another copy (literally in this case) because my paper copy was destroyed. There are a few other areas in the manual that overly simplified what needed to be done.
This brings me to another point, it says on the website ” Question:How long will it take to set up the tent with 2 people? A – Your first time should take you a little over one hour. After you are familiar with the setup of the tent, you can set it up comfortably in around 45 minutes.” Okay, maybe. I did it by myself and it took a solid eight hours.


The first thing I did was layout the floor and get it positioned into a place where I could be happy with it. The land wasn’t the most level right here, but its good enough. After that, all of these poles and parts started looking the same so I sorted them out so I could easily grab what I needed, when I need it. Finally, I started taking the red poles and made the arches for the roof.


After that I started assembling more of the roofing elements and struts. I kept assembling all of the parts until nightfall, and came back at it in the morning. I must of forgot an element of the instructions overnight cause ERROR ALERT: the gray poles underneath the red roof poles should be red. Oops. Another thing was that many of these instructions were really setup for 2 people assembly. For example, when the entire roof structure was assembled on the ground, it wasn’t strong enough to be lifted by a single person. The entire thing bowed and sagged, and I felt like I was going to break it, so it was disassembled (again) to be moved over to the flooring then reassembled. After the structure was largely in place, then I installed the flooring. Its a little out of order, but I wanted to shift and move things around before putting in the flooring.


The next part was to get the tent over the entire thing. That was not nearly as bad as I thought it was going to be. The tent was fairly lightweight and yes, I intentionally put it on backwards so the stove jack would be facing the front. At this point, its still low to the ground so you can work with all of the little details like securing it, and zipping it up, and other fun stuff.
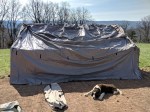
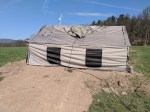
Getting the Extended All Weather Cover on top… that was a nightmare. So, what they said was “Drape the all weather cover and attach to roof”. Well, no. It’s too heavy to get up there by yourself. I mean, you can at least drape it on one side of the tent, but getting it over to the otherside isn’t really doable. I at least had an idea of tying all the hooks to a rope that I had, and throwing the rope over the tent. From there, I pulled the rope over, and got the rest of the cover over. The problem was…. how heavy it was. I completely distorted one of the hooks and destroyed it. So either its too heavy to do by yourself, or, they are using too soft of metal on the hooks. ![]() The obvious answer is, use a second person, but I don’t have a second person to do this with.
The obvious answer is, use a second person, but I don’t have a second person to do this with.

Another thing that bothered me was… LACK OF TECHNICAL DETAILS. For anyone thats wondering, the stove jack is 5 inches across. You think that would be mentioned some place so you could pair up your wood stove, stove pipe, and tent. But it wasn’t until I took a measuring tape to the hole did I find out the dimensions of the stove jack.


This is completely my fault. Once I got to the point of the instructions that said “use a grey tube to…” did I discover I put the wrong tube up top. DOH! I replaced the grey tubes one at a time with the red tubes. These bracers probably aren’t required by the manufacturer, but going that extra mile for strength and stability under adverse conditions is fantastic.


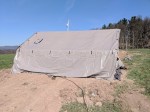
Next part was another challenge: adding a few more feet of piping to raise it up. While this probably shouldn’t have been a challenge, the strong winds that day prevented me from getting everything level. The wind kept blowing the tent off center, so I tied a rope to it, and the other side to the car. I drove the car forward until it recentered the tent. The poles meant to lift the tent could then drop into their assigned places and get the structure to the intended height.


Finally, I had the tent up! But that doesn’t mean its secured. One of the final steps is securing the walls and floors, to the frame. There are lots of pieces of equipment (straps, velcro, etc), but they are extremely short. I really struggled and man handled the equipment in most places to get it tied down. In others, I ended up leaving it as is because it couldn’t be strapped down.
In all (and I will do another review in the future), we had an issue here of design vs manufacturing. I feel like Barebone’s vision and design was completely dead on. I liked what they were striving for. However, there were issues with manufacturing that they had a problem with.
- Zippers are missing teeth
- Stitching was substandard
- Stitching had excess string floating all over me by the end of the day
- Frame vs tent was too tight
- Instruction are sub-standard
I think this will be a fantastic tent in the future, and will suit my needs. However, there are simple things that could have been done to prevent some of these frustrations. I may build a platform for it in the future, but that will be down the road.
